Help:Images: Difference between revisions
m (Text replacement - "Category:HelpCategory:Help under review" to "Category:Help") |
|||
| Line 434: | Line 434: | ||
* [[mediawikiwiki:Help:Images]] | * [[mediawikiwiki:Help:Images]] | ||
[[Category:Help | [[Category:Help]] | ||
[[Category:Pages with videos]] | [[Category:Pages with videos]] | ||
Latest revision as of 23:09, 7 October 2024
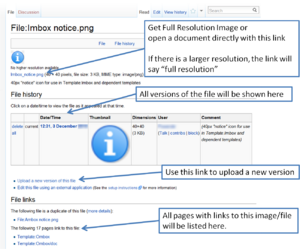

Images are one type of file that can be uploaded to Saintapedia and then added to pages by uploading graphic files into Saintapedia. Once uploaded, these images are an article just like any other article in Saintapedia except they are stored in the File namespace. Once uploaded, users can edit the articles and add narrative further describing the images.
The most important thing to remember when uploading images to select a name that is descriptive and unique because all uploaded documents reside in the same file drawer. Ask yourself the following question when thinking about the file name:
If I knew nothing about this file and came across it in three years, would it be reasonably clear from the filename what this image was?
Saintapedia also allows users to upload new versions of images and retain version control so it is almost never appropriate to include a specific date in the title. Use the body of the article to describe the image in greater detail.
Files can (and should) add categories to help further bin the image other similar groups of images. If nothing else, add the Images category if it is an image. To do so, put the following wikitext at the end of the article: [[Category:Images]].
Wikipedia has a tremendous wealth of information about how to use images. Several of the key pages include:
- Wikipedia's help with files
- a picture tutorial on Wikipedia
Image file types
Saintapedia is agnostic about the type of file type to use for your images. As of May 2021, Saintapedia accepts png, gif, jpg, jpeg, and svg. Note that Saintapedia sometimes does not render scaled images from GIF files very clearly. JPG/JPEG or PNG formats may give better results.
Adding image
Both editors have the ability to add images without leaving the article you wish to place an image. Images previously uploaded can always be added to any page on the wiki.
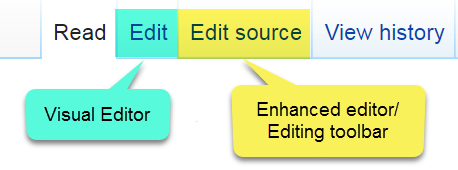
VisualEditor toolbar
To add a new image (or another type of media file) to the page, click the Media item File:VisualEditor media icon.PNG icon in the "Insert" menu. The image will be added where your cursor is located.
Clicking the "Media" icon opens a dialog box that automatically searches Saintapedia for media files related to the title of the page being edited.
Change the search by changing the text in the dialog's search box.
To choose a file, click on its thumbnail image to place the image onto the page being editing.
After the image you selected is inserted into the page, another dialog will open. This dialog allows you to add and edit the caption of the image. The caption can contain formatting and links.
You can use the caption to show a label that shows next to the item for all readers. This is often used to explain why the item is relevant to the context in which it is shown. It should be succinct and informative.
The media dialog also allows you to add alternative text captions, to help users who use screen readers, or who have disabled image display.
You can use this to write a text description for people who can't see the item. The description should be enough for them to understand the purpose and information given by the media item. This is vital for blind users and other people using screen-reader software or text-only browsers.
You can also set various parameters for the image in the "Advanced settings" window. These include the alignment, the type, and size of the image.
- Position - You can set where this media item appears on the page. This is sometimes used to break up a long line of images on one side of the page.
- Wrap text around this item - You can make this media item appear inline with the text of the page instead of floating. You should only do this rarely, as it will break up the flow of the text if you uncheck this box.
- Image type - You can set how the media item appears on the page. This should be the thumbnail format to be consistent with other pages in almost all cases.
- Image size - You can set how large the media item appears on the page. This should almost always be the normal size, as a custom size will interfere with the layout of the page for readers and make it inconsistent.
When you're done, click "Apply changes" to close the dialog and return to editing the page.
For an existing image, you can add or edit a caption or other settings by clicking on the image, then clicking on the "Media" icon that appears below the picture. You can resize an existing image by clicking on it, then moving the resize icon (the two-headed arrow on one or both bottom corners).
You can also drag and drop an image to a place higher or lower on the page.
Enhanced editor toolbar
The image file must first be uploaded to Saintapedia. A file page will be created once you upload it. Immediately below explains how to display an image (or PDF) using the Editing Toolbar (call a File link). For more options see Image syntax and Detailed syntax (Advanced).
- Place the cursor where you wish the file to appear
- Click the "Insert an image" icon (
 . An Insert file box will open (see below).
 - In the "Filename" add the title from the file page
- Add a caption to the photo (optional)
- Add a image size (optional); if left blank it will show the image in the size of the uploaded file
- Choose the alignment/location of the photo (Options - default, none, center, left, or right)
- Pick the Image Type to set border and scaling (Options - thumbnail, framed, frameless, or none)
- Click on "Insert"
- Make sure to save the page.
When the page is displayed, the file will appear where it was inserted. Please also add the Alt attribute so that the content is accessible to those with disabilities (required by Section 508).
VisualEditor
VisualEditor has the ability to modify many of the settings of uploaded images, including images uploaded during the current session or existing images on a page. See VisualEditor toolbar for more details.
Settings options in editors
| VisualEditor | Enhanced editor only | |
|---|---|---|
| General settings | Advanced settings | |
|
|
|
Enhanced editor
Below is a listing of all the options when using Enhanced editor ("Edit Source"). Most of these settings can be done using VisualEditor, but not all of them. If it is not an option in VisualEditor, Enhanced editor will need to be used.
Image syntax
The following information aid on syntax for images was originally derived from this version of Wikipedia's page: "Wikipedia:Extended image syntax"
[[File:Name|Type|Border|Location|Alignment|Size|link=Link|alt=Alt|Caption]]
Only Name is required. Most images should use "[[Image:Name|thumb|alt=Alt|Caption]]" and should not specify a size. The other details are optional and can be placed in any order.
- Type
- "
thumb" (or "thumbnail"; either can be followed by "=filename"), "frame" (or "framed"), or "frameless". Display the image with specific formatting (see below). - Border
- "
border". Put a small border around the image. - Location
- "
right", "left", "center" or "none". Determine the horizontal placement of the image on the page. This defaults to "right" for thumbnails. - Alignment
- "
baseline", "middle", "sub", "super", "text-top", "text-bottom", "top", or "bottom". Vertically align the image with respect to adjacent text. This defaults to "middle". - Size
- "Width
px" or "xHeightpx" or "WidthxHeightpx" or "upright" or "upright=Factor". Scale the image to be no greater than the given width and/or height, keeping its aspect ratio. With "upright", scale a thumbnail from its default size by the given factor (default 0.75), rounding the result to the nearest multiple of 10 pixels. Size is disabled when the image is 'framed'. - Link
- Link the image to a different resource, or to nothing. Must not be set for non-public domain images unless attribution is provided in some other fashion.
- Alt
- Specify the alt text for the image. This is intended for visually impaired readers. See WP:ALT
 for how this typically should differ from the caption.
 - Caption
- Specify the image's caption.
- Page
- Specify a page number to view (for PDF files only)
It does not matter whether the file is from Wikimedia Commons or on Wikipedia; the same syntax is used.
Detailed syntax
The image syntax begins with "[[", contains components separated by "|", and ends with "]]". The "[[" and the first "|" (or, if there is no "|", the terminating "]]") must be on the same line; other spaces and line breaks are ignored if they are next to "|" characters or just inside the brackets. Spaces or line breaks are not allowed just before the "=" in the following options, and may have undesirable side effects if they appear just after the "=".
Type
Zero or one of these options may be specified to control whether or not the image is scaled down and given a border.
thumb- (Or
thumbnail.) Scale the image down, and put a box around the image. Show any caption below the image. Place the image on the right unless overridden with the location attribute. If no image size is specified, use a per-user preference for logged-in users (see "Thumbnail size" under Special:Preferences/Appearance/Files), defaulting to 220 pixels for non-logged-in users. With an operand, e.g., "thumb=Example.png", the operand names an image that is used as the thumbnail, ignoring any size specification. - Thumbnailing animated GIFs is not supported. Thumbnailing an animated GIF does not result in an error, so there is no warning, but the animated GIF is not processed. Instead the original animated GIF is shipped, and whether the animated GIF is subsequently scaled to fit the allotted space is down to the capabilities of the receiving browser.
frame- Preserve the original image size, and put a box around the image. Show any caption below the image. Sizing does not work when "
frame" is used. - (nothing specified)
- Preserve the original image size, and do not add a border around the image. Do not show a caption. If no alt text is specifically requested, use the requested caption as alt text.
frameless- Like "
thumb", but omit the visible caption and the box around the image. Another way to put it is that this is like specifying no type, except that the default size is that of a thumbnail and the "upright" option works.
Border
border- Generate a one-pixel border around the image. This has an effect only around unframed images, as framed images always have borders.
Location
Zero or one of these options may be specified to control the position of the image.
right- Place the image on the right side of the page. The article text that follows the image flows around the image. This is the default.
left- Place the image on the left side of the page. The article text that follows the image flows around the image.
center- Place the image in the center of the page. The article text that follows the image is placed below the image.
none- Place the image on the left side of the page. The article text that follows the image is placed below the image.
Vertical alignment
Zero or one of these options may be specified to control the vertical alignment of the image with respect to adjacent text. These options apply only to plain images, which do not cause breaks and are not floated. In the following list, each option's explanation is preceded by what Image:Flag of Hungary vertical.png looks like when aligned with that option, using the markup:
[[Image:Flag of Hungary vertical.png|option|7px|link=|alt=]]
baseline Align the bottom of the image with the baseline of the text.
- middle
 (This is the default.) Align the vertical middle of the image with the baseline of the text plus half the x-height of the text, so that the image is vertically centered around a lower case "x" in the text.
- sub
 Align the bottom of the image to the same level that the bottom of a subscript would be, such as the bottom of the "2" in "X2".
- super
 Align the bottom of the image to the same level that the bottom of a superscript would be, such as the bottom of the "2" in "X2".
- text-top
 Align the top of the image to the top of the text. This is often a bit higher than the top of a capital letter, because of ascenders in letters like lower-case "h".
- text-bottom
 Align the bottom of the image to the bottom of the text. This is somewhat lower than the baseline, because of descenders in letters like lower-case "y".
- top
 Align the top of the image to the top of the line containing the text. Normally this is slightly higher than the top of the text, to make space between lines of text.
- bottom
 Align the bottom of the image to the bottom of the line containing the text. Normally this is slightly lower than the bottom of the text.
Size
Zero or one of these options may be specified to control the size of the image. In the case of images with captions, if the image is already smaller than the requested size, then the image retains its original size (it is not enlarged). In the case of images without captions, the image will be enlarged or reduced to match the requested size. Sizing is disabled when a 'frame' is used.
- Width
px - (E.g., "
100px".) Scale the image to make it the specified number of pixels in width, and scale the height to retain the original aspect ratio. xHeightpx- (E.g., "
x150px".) Scale the image to make it the specified number of pixels in height, and scale the width to retain the original aspect ratio. - Width
xHeightpx - (E.g., "
100x150px".) Scale the image to be no wider and no higher than the specified number of pixels. The image will keep its original aspect ratio. - (nothing specified)
- For thumbnails, use the size specified in preferences for logged in users, and use a size determined by resolution for anonymous users. For non-thumbnails, use the native size of the image.
upright- Scale a thumbnail image to 75% of normal thumbnail width, rounding the result to the nearest multiple of 10 pixels.
upright=Factor- Adjust a thumbnail's size to Factor times the default thumbnail size, rounding the result to the nearest multiple of 10. For instance, "
upright=1.5" makes the image larger, which is useful for maps or schematics that need to be larger to be readable. The parameter "upright=1" returns the same size as thumbnail width, and "upright=0.75" is functionally identical to "upright" alone.
The "upright" option must be used along with the "thumb" parameter.
Resizing animated GIFs is not supported. Resizing an animated GIF does not result in an error, so there is no warning, but the animated GIF is not processed. Instead the original animated GIF is shipped, and whether the animated GIF is subsequently scaled to fit the allotted space is down to the capabilities of the receiving browser.
Basic example
Add a pipe (|) followed by the width in pixels (px), such as what you see below. This works for both images (jpg, png, gif, etc.) as well as PDFs.
Link
Ordinarily, an image acts as a hypertext link to the image description page, a page with information about the image itself. Using the link option allows an image to act as a hypertext link to a different page. See [[[Wikipedia:Wikipedia:Images linking to articles#|Wikipedia:Images linking to articles]]![]() for more information.
for more information.
link=Page- The image acts as a hypertext link to the specified page. Do not enclose the page name in square brackets. If Page is a URL, the image acts as an external link; otherwise it links to the named Wikipedia page.
link=- No hyperlink is created. Clicking on the image will have no action.
The "link" parameter cannot be used in conjunction with "thumb", as "thumb" is always meant to link to the larger version of the image. In addition, "link" cannot be used with "frame".
If you do not want the image to be clickable, only add:
link= without the Page
Alt text and caption
Zero or more of these options may be specified to control the alt text, link title, and caption for the image. Captions may contain embedded wiki markup, such as links or formatting. See Wikipedia:Captions for discussion of appropriate caption text. See Wikipedia:Alternative text for images for discussion of appropriate alt text. Internet Explorer displays the link title as a tooltip but other browsers may not.
alt=Alt- Use Alt as the alt text for the image.
- Caption
- (any text that is not recognised as some other part of the image syntax): How this text is used depends on the image type. When the type has a visible caption ("
thumbnail", "thumb", "frame" or "framed") then this text appears as a caption below the image. Otherwise, (if the image type is unspecified or is "frameless"), this text is used for the link title provided the link has not been suppressed with "|link=", and also for the alt text provided an explicitalt=Alt has not been supplied.
The actual alt text for the displayed image will be one of the following, in order of preference:
- The explicitly requested Alt, if any;
- The explicitly requested Caption, if the image type has no visible caption;
- The empty string, if there is an explicitly requested Caption and the image type has a visible caption.
- The image file name if there is no explicitly requested Alt or Caption. This is never a satisfactory option.
It is only possible to specify the link title text for images with no visible caption (as described above). However, as not all browsers display this text, and it is ignored by screen readers, there is little point.
How to display an image in uploaded size, with a caption
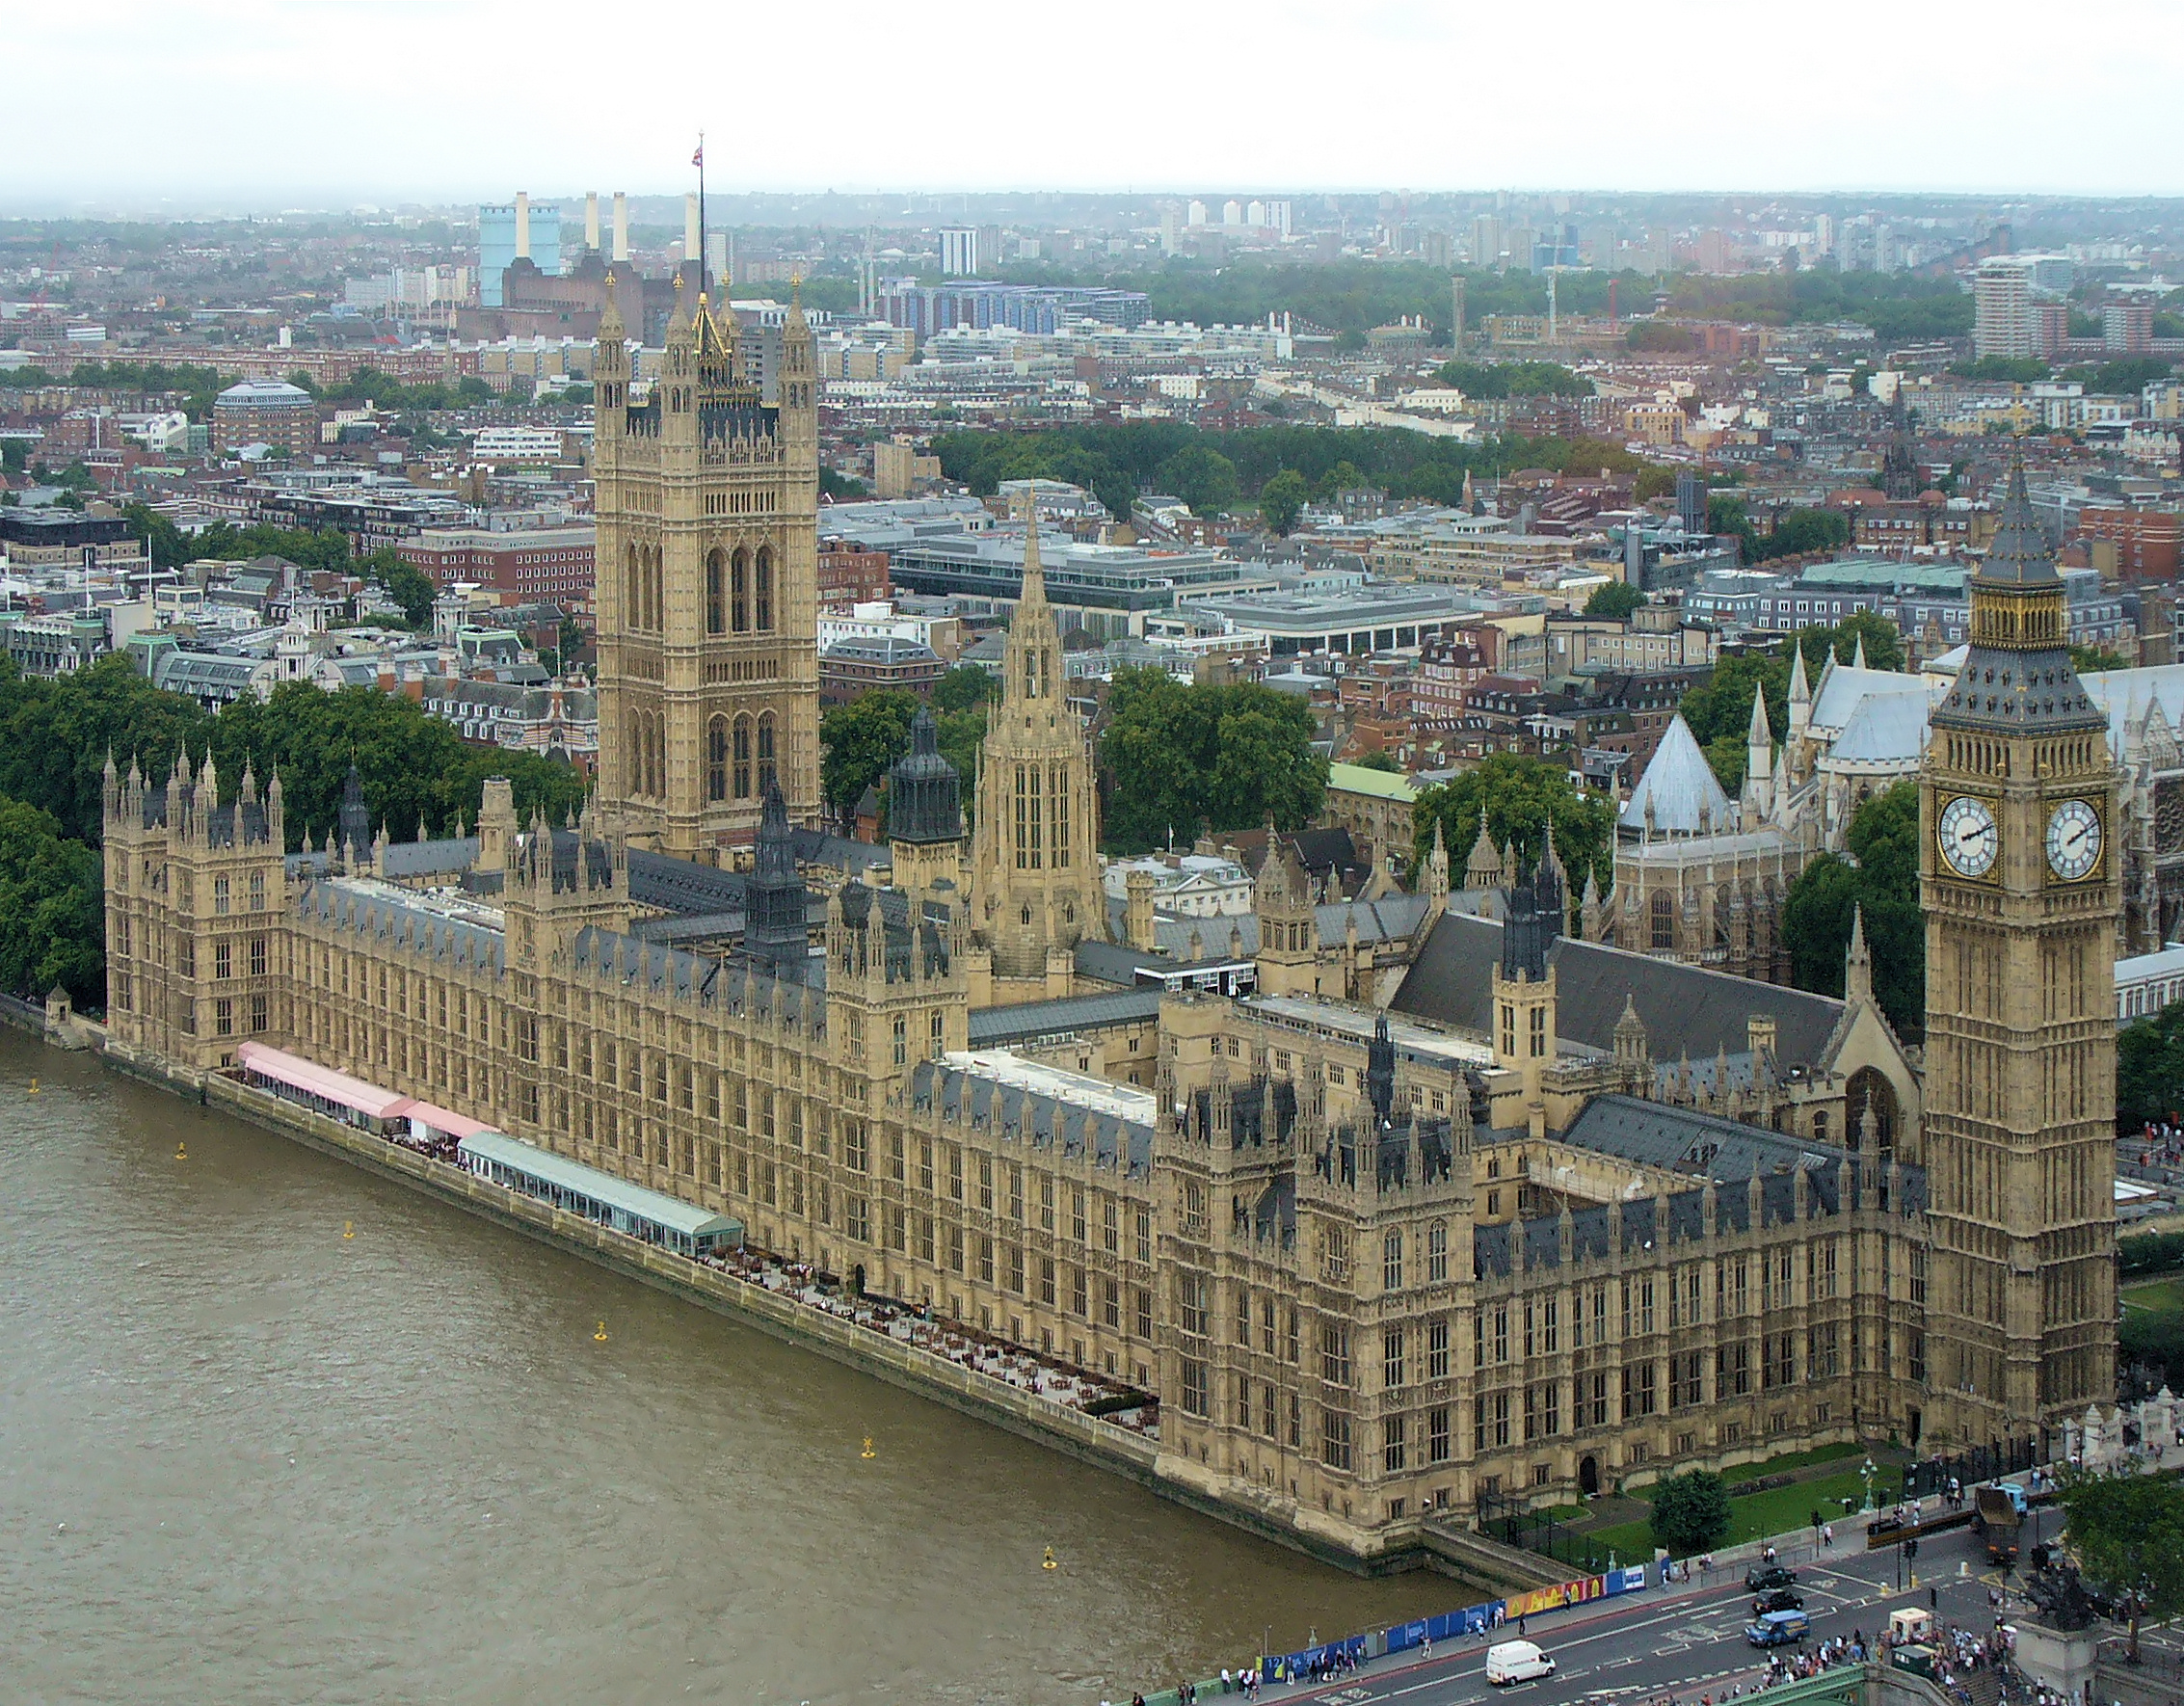
To display an image as uploaded with a caption use [[Image:Westminstpalace.jpg|frame|none|alt=alt text|caption text]].
How to display an image with no caption or formatting
The old syntax for images without captions is [[Image:Westminstpalace.jpg|alt text]]. This is rendered inline, and the specified text is used as the image's alt attribute (alternate text for programs which cannot display images, such as screen readers) and as the title attribute (supplementary text, often displayed as a tool tip when the mouse is over the image).
See Wikipedia:Image markup with HTML for an old, deprecated, way of putting a caption under the image using HTML code. Please use the new way of associating captions with images, as described on this page.
See Wikipedia:Captions for discussion of appropriate caption text. See Wikipedia:Alternative text for images for discussion of appropriate alt text.
Example
New syntax for images
The new syntax is backward compatible, so articles don't have to be changed.
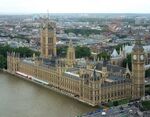
In the syntax [[Image:filename|options]] (e.g., [[Image:Westminstpalace.jpg|thumb|100px|left|alt=A large clock tower and other buildings line a great river.|The Palace of Westminster]] shown in the left), several options can be set when including an image. Those affect the placing of the image, its size or the way the image will be presented. The options are right, left, center, none, sizepx, thumbnail (thumb), frame, and alternate (caption) text.
- The options can be combined, and vertical bars ("|") are used to separate options from each other.
- Do not put spaces around the vertical bars for readability – options will not be interpreted correctly.
- The options can be put in any order.
- An unknown option is taken as the caption text, but this will appear only if
thumbnailorframeare specified. - If there are two or more unknown options, the last one upstages the rest:
[[Image:Westminstpalace.jpg|thumb|alt=A large clock tower and other buildings line a great river.|The Palace of Westminster|200px|right|From the Thames]](shown on the right).
Here is the description of the options other than the caption text:
right
The image is right-aligned, and text floats to the left of the image: [[Image:Westminstpalace.jpg|right|70px|alt=A large clock tower and other buildings line a great river.]] (shown on the right).
left
The image is left aligned, and text floats to the right of the image: [[Image:Westminstpalace.jpg|left|70px|alt=A large clock tower and other buildings line a great river.]] (shown on the left).
center
The image is centered, and...
the text following the image starts below it: [[Image:Westminstpalace.jpg|center|70px|alt=A large clock tower and other buildings line a great river.]] (shown above).
none
The image is put at the left, and...
the text following does not float to the right (or to the left, obviously), and starts below it: [[Image:Westminstpalace.jpg|none|70px|alt=A large clock tower and other buildings line a great river.]] (shown above).
- Notes:
- The above four options are incompatible. When used combined, the first one overrides the rest:
[[Image:Westminstpalace.jpg|center|left|none|right|70px|alt=A large clock tower and other buildings line a great river.]](shown in the center).
- What is between the last vertical bar and the closing brackets ("]]"), void or not, is taken as the last option, and works as usual. For instance, when the last option is
right, the image is right-aligned, and text floats to the left:[[Image:Westminstpalace.jpg|70px|alt=A large clock tower and other buildings line a great river.|right]](shown on the right).
- What is between the last vertical bar and the closing brackets ("]]"), void or not, is taken as the last option, and works as usual. For instance, when the last option is
- In particular, if the last option is the void text (that is, if there is nothing between the last vertical bar and the closing brackets), the caption is not displayed:
[[Image:Westminstpalace.jpg|thumb|alt=A large clock tower and other buildings line a great river.|This text is not displayed.|70px|left|]](shown on the left) and[[Image:Westminstpalace.jpg|thumb|alt=A large clock tower and other buildings line a great river.|This text is displayed.|70px|right]](shown on the right).
- In particular, if the last option is the void text (that is, if there is nothing between the last vertical bar and the closing brackets), the caption is not displayed:
sizepx- This option renders a version of the image that's [size] pixels wide (e.g.,
[[Image:Westminstpalace.jpg|right|50px|alt=A large clock tower and other buildings line a great river.]]shown on the right). Height is computed to keep (i.e. the shape of the image)
- Notes:
- Specifying a size does not just change the apparent image size using HTML; it actually generates a resized version of the image on the fly and links to it appropriately. This happens whether or not you specify the size in conjunction with "
thumb".
- This means the server does all the work of changing the image size, not the web browser of the user. By having the server do all the work means faster downloading of pages. It also means that larger images can be stored on the server without any slowdown by the browser (especially on dial up telephone lines.) Only the data for the actual size on the page is transmitted.
- An exception is animated GIF. Animated GIFs are not processed by the server. When a smaller size is specified the original full sized animated GIF is served. Whether the animated GIF is subsequently scaled to fit the allotted space is down to the capabilities of the receiving browser. Resizing an animated GIF will significantly reduce its quality, without any reduction of download time.
- From MediaWiki 1.5 the default thumbnail width can be set in the preferences, so it is recommended not to specify "px", in order to respect the users' preferences (unless, for a special reason, a specific size is required regardless of preferences, or a size is specified outside the range of widths 120–300px that can be set in the preferences).
- If you specify a "frame" option the image will not be scaled, and no size specifiers will be in the HTML. The image will be rendered at full size
- When there are two or more "size" options, only the last one is valid:
[[Image:Westminstpalace.jpg|right|50px|80px|alt=A large clock tower and other buildings line a great river.]](shown on the right).
- When there are two or more "size" options, only the last one is valid:
thumbnail,thumb- The
thumbnail(thumb) option generates a image. It is automatically resized when the "size" attribute is not specified. Without the optionsleft,center, andnone, the image is normally on the right. If the image has a caption text, it is displayed in the lower margin. E.g.,[[Image:Westminstpalace.jpg|thumbnail|left|100px|alt=A large clock tower and other buildings line a great river.]](shown on the left) and[[Image:Westminstpalace.jpg|thumb|alt=A large clock tower and other buildings line a great river.|The Palace of Westminster]](shown on the right). Note: thumbnail (thumb) cannot be used in lists.
An "enlarge"-icon is put also in the lower margin of the thumbnail. Both the image itself and the icon link to the image description page with the image in its actual size. The icon shows the link title "Enlarge" in its hoverbox, even in cases where this term does not apply, because it leads from the enlarged image to the one with the actual size. E.g., [[Image:tst.png|right|thumb|100px|alt=tiny globe|This is a globe, and take a look at it in [[Media:tst.png|the actual size]].]] (shown on the right).
upright- The
uprightoption works in combination with thethumbnailorthumboption to resize an image to about 75% of the width of a plainthumbnail. Theuprightoption scales larger or smaller in step with user screen resolution. The relative size can be determined with a multiplier such asupright=x. If x=1 then the image is standard thumbnail width. E.g.,[[Image:Westminstpalace.jpg|thumbnail|upright|left|alt=A large clock tower and other buildings line a great river.|The "<code>upright</code>" option is about 75% of thumbnail width.]](shown on the left) and[[Image:Westminstpalace.jpg|thumb|upright=1.5|right|alt=A large clock tower and other buildings line a great river.|The "<code>upright=1.5</code>" option]](shown on the right).
frame- With this option, the embedded image is shown with its actual size enclosed by a frame, regardless of the "thumb" or "size" attribute, and the caption, if any, is visible in the frame. Without the options
left,center, andnone, the image is normally on the right:[[Image:Westminstpalace.jpg|frame|thumbnail|50px|alt=A large clock tower and other buildings line a great river.|The Palace of Westminster]].
With none of the options other than sizepx and alternate (caption) text, an embedded image is rendered inline.
text text text text text text
[[Image:Westminstpalace.jpg|150px|alt=A large clock tower and other buildings line a great river.|The Palace of Westminster]]
text text text text text
[[Image:tst.png|100px|alt=tiny globe|This is a globe.]]
text text text text
gives
text text text text text text
 text text text text text
This is a globe.
text text text text
The option none can be used to have thumbnails without left- or right-alignment. This is probably most useful for tables. This is an example:
How to use none
| ||
|---|---|---|
| London's palaces | ||
| Palace of Westminster | [[Image:Westminstpalace.jpg|thumb|none|100px|alt=A large clock tower and other buildings line a great river.|From the Thames]]
| |
| Palace of Westminster | [[Image:Westminstpalace.jpg|thumb|none|100px|alt=grand city building below beautiful blue sky and clouds|Queen's home]]
| |
Thumbnail with caption text underneath that has one or more links
From MediaWiki 1.3, it is also possible to include links in the caption text, e.g.:
[[Image:Westminstpalace.jpg|right|thumbnail|alt=A large clock tower and other buildings line a great river.|This is the [[Palace of Westminster]] in London]]
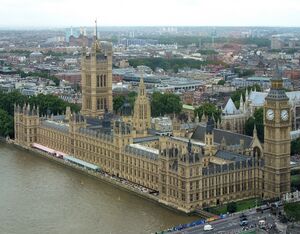
Just make sure the number of opening and closing square brackets are right. One extra or missing would mean the entire image syntax line would not work.
Additional caption formatting options
Additional caption formatting options are possible.
[[Image:Westminstpalace.jpg|right|thumbnail|alt=A large clock tower and other buildings line a great river.|<div align="center">This is <span style="color: green">the </span><br /> [[Palace of Westminster]]<br /> '''in <span style="color: red">London</span>'''</div>]]
All of the normal text formatting options work.
Compatibility considerations
The floating options left, center, and right explained above are supported by modern browsers, but don't work with older browsers. If necessary it's simple to get a floating effect also for old browsers:
|
{| align="right"
| [[Image:Westminstpalace.jpg|160px|alt=A large clock tower and other buildings line a great river.|Example]]
|}
This code is not intended for general use, however. There are few, if any, instances where support for such legacy browsers is necessary.
Cancelling floating-around-image mode
After having had an image floating next to text, putting further text below it and again using the full width can be done with the following markup. This blocks an image from appearing next to the material following this markup, possibly due to aesthetic reasons or a change in topics.
<br style="clear:both" />
For legacy align="right" (etc.) floating this
isn't good enough; legacy browsers would ignore inline
CSS. To cancel floating under all conditions the
following markup (valid XHTML 1.0 transitional) works:
<br clear="all" />
The same code can be issued by using template {{clear}} or {{Clr}} or {{-}} in certain namespaces (En, meta).
Linking to the image description page
If you want to make a link to the description page for an image, use a leading colon before "Image:" in an intra-wiki link, like this: [[:Image:STS-32 crew.jpg|STS-32 crew]] which yields: STS-32 crew
Images that link somewhere other than the image description page
It is possible to make an image that links to a different page instead of to the image description page by using the "|link=" option. To disable the link altogether and have a purely decorative image, in the sense that the image is not shown to visually impaired readers, use "|link=|alt=", with no arguments for either parameter.
Image galleries
An image gallery displays several pictures in different layouts, including rows and columns. Be aware that different screen size and browsers may affect accessibility for some readers.
The can be added using both editors:
- VisualEditor - Media galleries
- Enhanced editor (see examples below)
See Image gallery mode parameters and Help:Gallery tag![]() for more details. There is also
for more details. There is also {{Multiple image}} than can do similar functions.
Default gallery of photos example
<gallery>
File:Edit button.png|Edit button
File:We Can Edit.jpg|We Can Edit poster
File:Saint icon.jpg|Saint icon
File:Purge-icon.png|Purge icon
</gallery>
Options:
- showfilename=yes
- showfilename=no
Packed hover
For example:
<gallery mode="packed-hover">
Image:Edit button.png|Edit button
Image:We Can Edit.jpg|We Can Edit poster
Image:Saint icon.jpg|Saint icon
Image:Purge-icon.png|Purge icon
</gallery>
Gives (mode: packed-hover):
Traditional
mode="traditional"
No lines
mode="nolines"
Packed
mode="packed"
Packed overlay
mode="packed-overlay"
Slideshow
Other options
{{Multiple image}} template creates a box with two to ten images arranged vertically or horizontally with captions for the entire box and/or for each images.
Scaling images
<pic file="Space weather phenomena illustration.png" width="30%" align="right" caption="Space weather phenomena illustration" />The AdaptiveThumb extension ![]() allows you to show thumbnails of images that scale with the browser window. To use this extension, simply put a <pic> tag on your page, such as:
allows you to show thumbnails of images that scale with the browser window. To use this extension, simply put a <pic> tag on your page, such as:
- <pic file="Space weather phenomena illustration.png" width=30% align=right caption="Space weather phenomena illustration" />
Limitations
- There is no way to add a link or an alternative text


